DIY Popcorn Ceiling Removal: Step-by-Step Instructions for a Smooth Finish
Popcorn ceilings, once a popular design choice for their noise-dampening properties and ability to hide imperfections, have fallen out of favor in modern home decor. Removing a popcorn ceiling can drastically improve the aesthetics of a room, giving it a more contemporary look. This comprehensive guide will walk you through the step-by-step process of DIY popcorn ceiling removal to achieve a smooth finish. By following these instructions, you can tackle this project confidently and transform your living space.
Why Remove Popcorn Ceilings?
Popcorn ceilings, also known as acoustic or stucco ceilings, were widely used in homes built between the 1950s and 1980s. They are now considered outdated and can negatively impact the value of your home. Additionally, they can harbor dust, cobwebs, and allergens, and in some cases, may contain asbestos, which is a health hazard if disturbed.
Tools and Materials You’ll Need
Before starting the stucco removal process, gather the necessary tools and materials:
- Plastic sheeting or drop cloths
- Painter’s tape
- Safety goggles and a dust mask
- A long-sleeve shirt and gloves
- A ladder
- A garden sprayer or spray bottle
- Putty knives or a drywall taping knife
- Sandpaper or a sanding pole
- Joint compound
- A drywall primer and paint
Step 1: Test for Asbestos
Before you begin, it’s crucial to test the popcorn ceiling for asbestos, especially in homes built before the 1980s. Asbestos testing kits are available at most hardware stores, or you can hire a professional. If asbestos is present, do not attempt to remove the ceiling yourself. Contact a licensed asbestos abatement contractor to handle the removal safely.
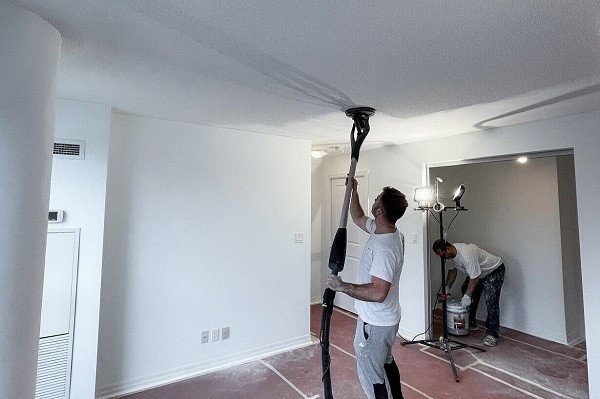
Step 2: Prepare the Room
Clear the room of all furniture and cover the floors with plastic sheeting or drop cloths. Use painter’s tape to secure the plastic sheeting to the baseboards. Cover the walls with plastic sheeting as well, taping it in place to protect from any overspray or debris. Removing or covering light fixtures and ceiling fans is also a good idea to prevent damage.
Step 3: Wet the Ceiling
Fill a garden sprayer or spray bottle with water. Working in small sections, lightly mist the ceiling with water. Let the water soak in for about 15-20 minutes. This will soften the texture, making it easier to scrape off. Avoid over-saturating the ceiling, as too much water can damage the drywall underneath.
Step 4: Scrape Off the Popcorn Texture
Using a putty knife or a drywall taping knife, gently scrape off the popcorn texture. Hold the knife at a slight angle and apply even pressure. Work systematically across the ceiling, being careful not to gouge the drywall. If you encounter stubborn areas, mist them with water again and wait a few minutes before scraping.
Step 5: Repair Any Damage
Once you’ve removed the popcorn texture, inspect the ceiling for any damage. Fill small nicks or gouges with joint compound, using a putty knife to smooth it out. For larger holes or damaged areas, you may need to apply a drywall patch. Allow the joint compound to dry completely, then sand it smooth using sandpaper or a sanding pole.
Step 6: Sand the Ceiling
After repairing any damage, sand the entire ceiling to ensure a smooth surface. Use fine-grit sandpaper and work in circular motions. This step is essential for achieving a professional-looking finish. Wear a dust mask and goggles to protect yourself from dust.
Step 7: Prime the Ceiling
Apply a coat of drywall primer to the ceiling. Primer helps to seal the surface and provides a good base for paint. Use a roller for large areas and a brush for corners and edges. Allow the primer to dry according to the manufacturer’s instructions.
Step 8: Paint the Ceiling
Finally, paint the ceiling with your desired color. Use high-quality ceiling paint and apply it with a roller for even coverage. A second coat may be necessary for a uniform finish. Let the paint dry completely between coats.
Tips for a Successful Project
- Work in small sections: This prevents the water from drying before you can scrape off the texture.
- Protect your floors and furniture: Removing popcorn ceilings can be messy, so covering everything thoroughly will save you cleanup time.
- Keep tools clean: Frequently clean your putty knife to prevent buildup and ensure smooth scraping.
- Stay safe: Wear protective gear, including safety goggles, a dust mask, gloves, and long sleeves, to avoid injury and irritation from dust and debris there https://www.renovated-home.ca/
Conclusion
Removing a popcorn ceiling can be a rewarding DIY project that significantly enhances the look of your home. By following these step-by-step instructions, you can achieve a smooth, modern ceiling without the need for professional help. Whether you’re updating your home for personal enjoyment or increasing its market value, a sleek, popcorn-free ceiling is a worthwhile investment. Take your time, stay safe, and enjoy the transformation of your living space.